Felting a Kayaker
step by step tutorialMaterials List
Felting needles
Sturdy foam or wool pad
Prepared fiber base with hanging loop
Dark & white wool for the kayak paddle
Flesh tones and hair color for the kayaker
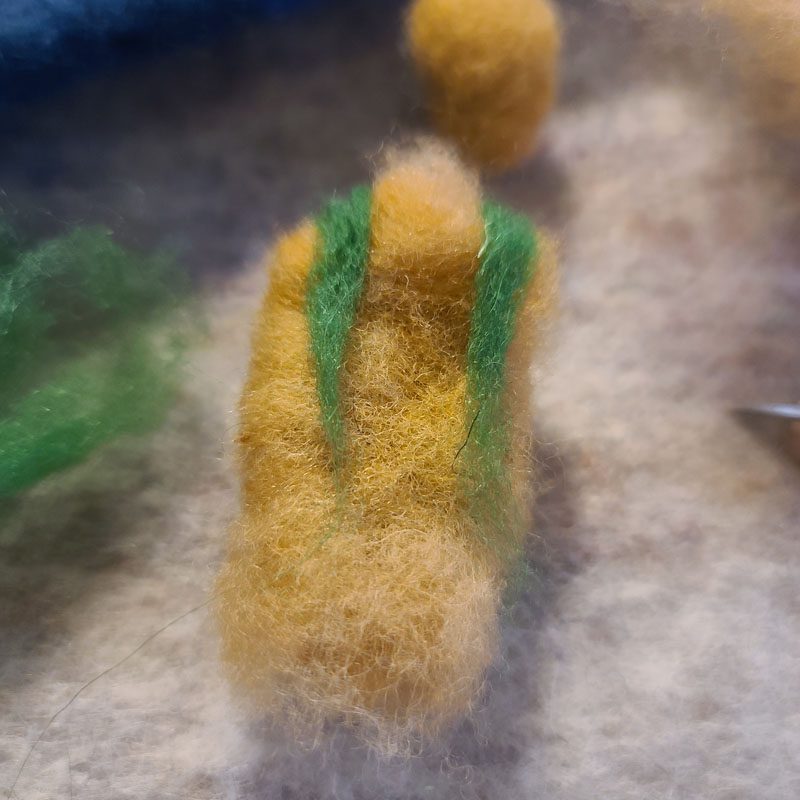
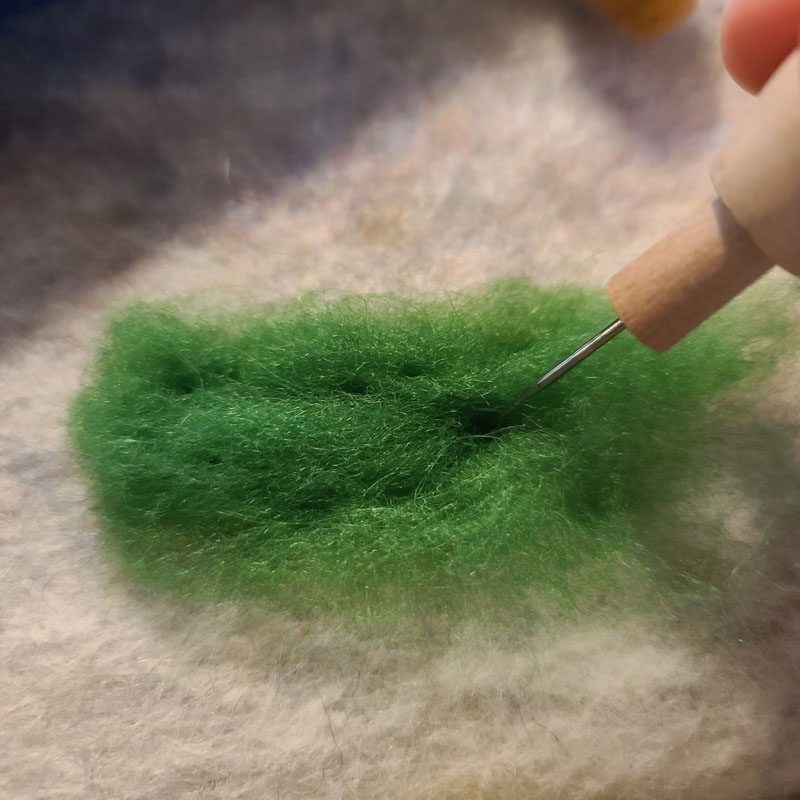
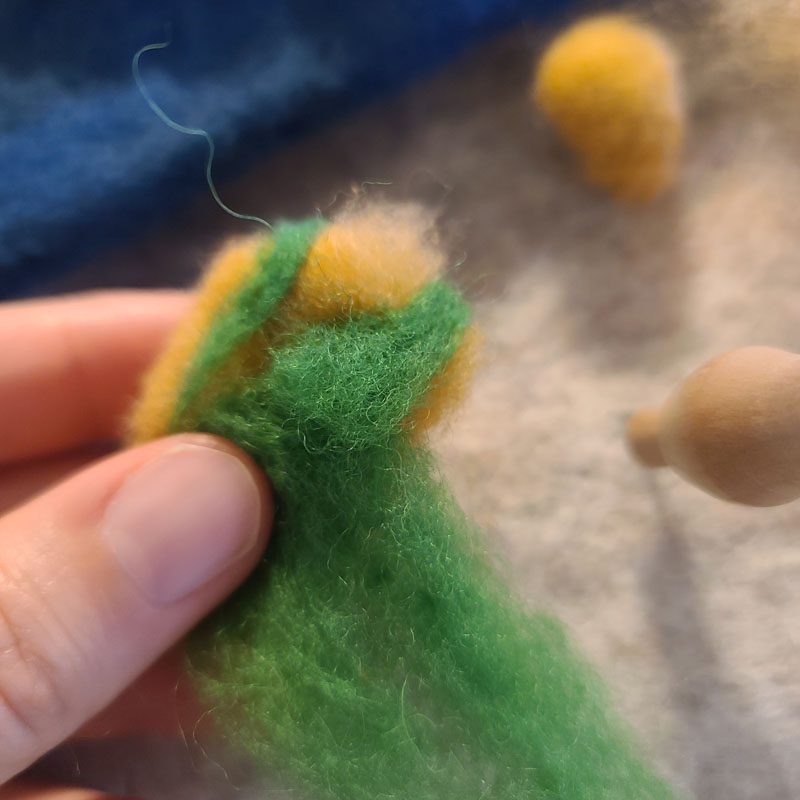
Wool in a color for the life jacket
In this felting lesson, I use still image detail shots of the stages to needle felt and assemble a Kayaker. The techniques used in this lesson focus on the art of combining fully formed 3D elements. onto a 2D base displayed as a wall hanging. The nature of this design pushes this combination to an extreme, with the torso, arms, and paddle of the kayaker all popping entirely off the surface of the base. This process was captured while working on the K illustration for my ABC children’s book.

Popping Off a Dark Background
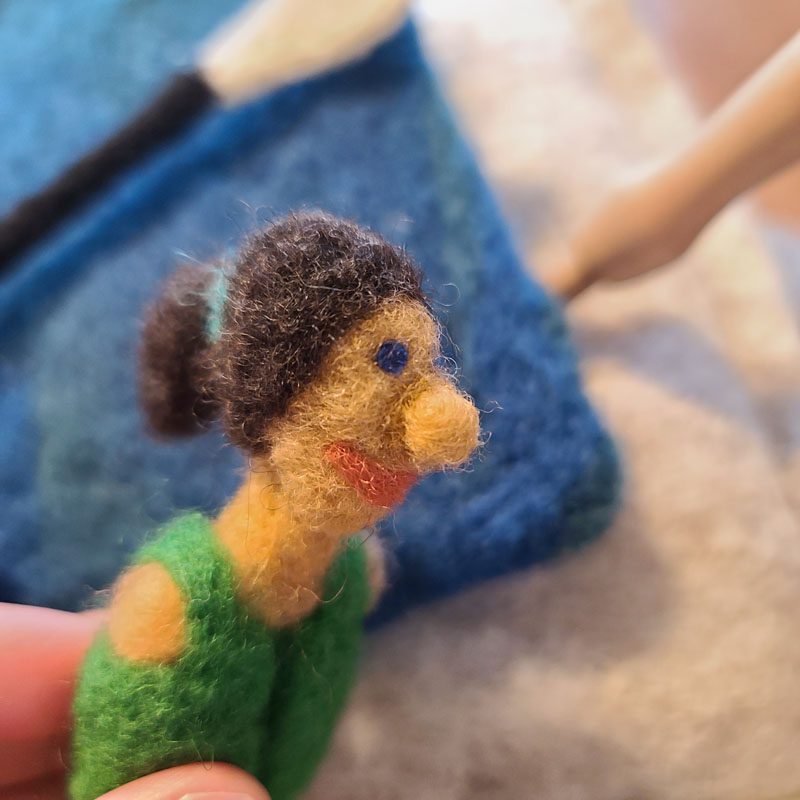
I chose dark blue for this background color so that it has a watery appearance, but still provides a stark contrast to the kayak, the bright green color of the lifejacket, and the kayaker’s flesh tone. Color choice is very important, and I tend to lean toward colors with more of a distinct contrast.


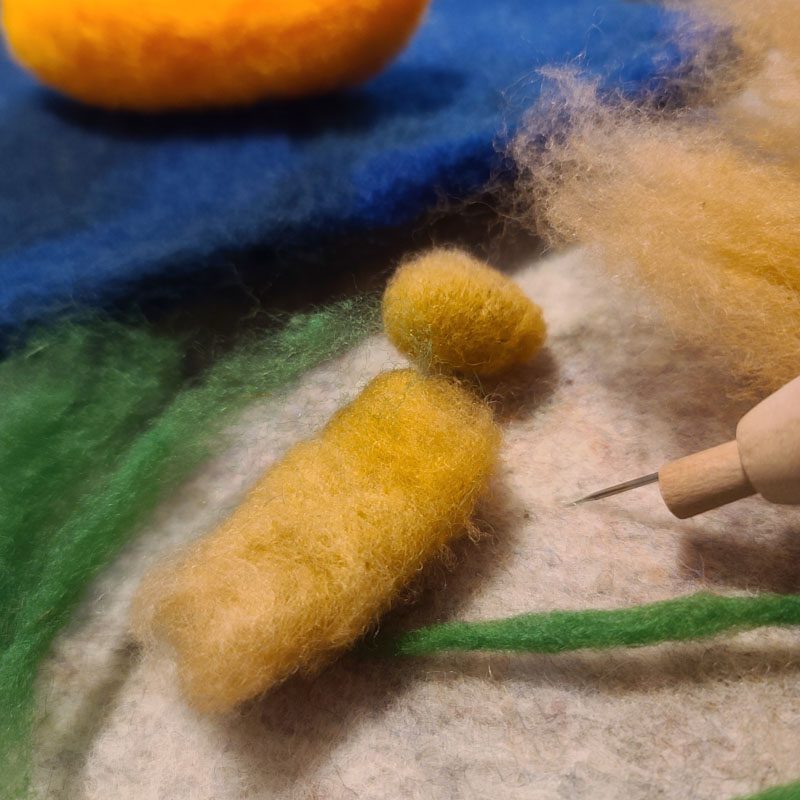
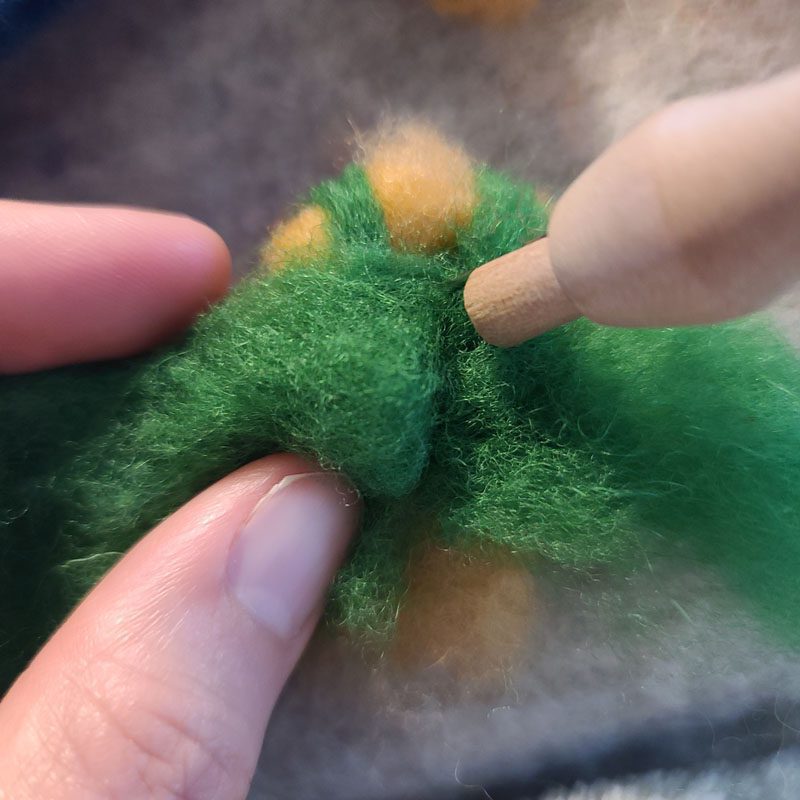
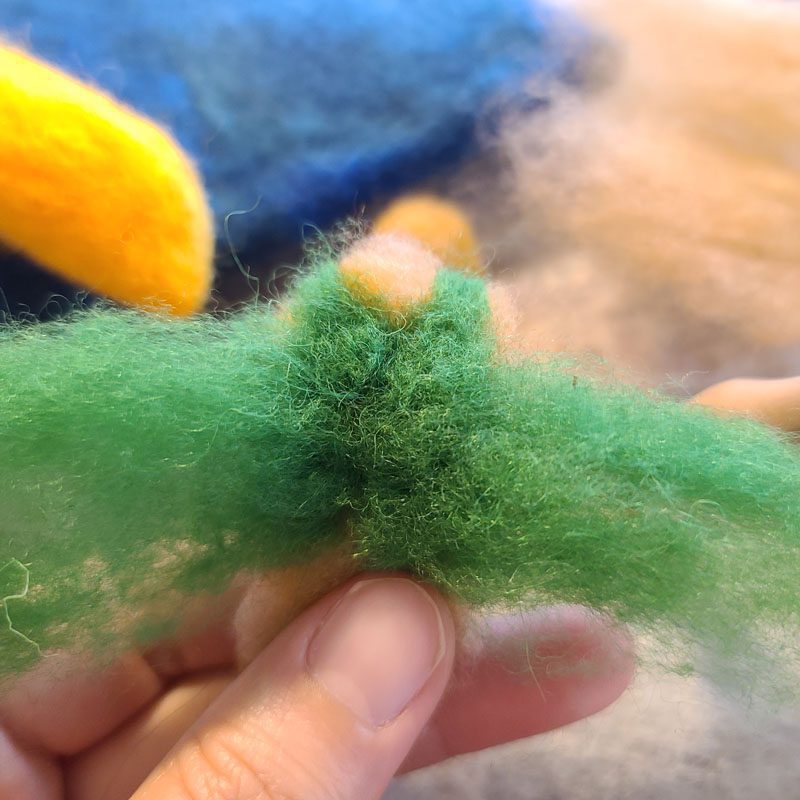
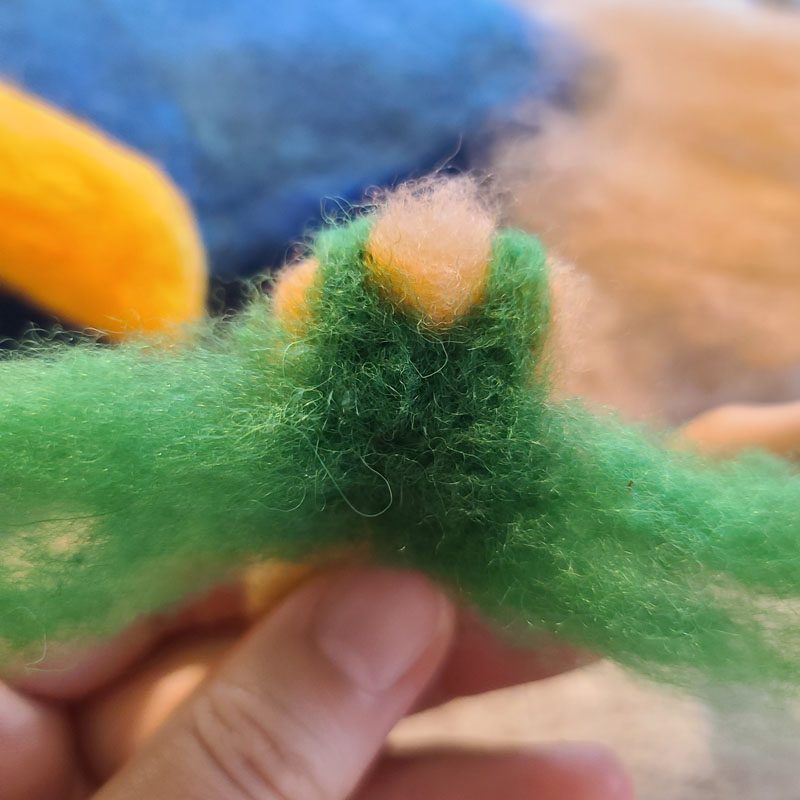
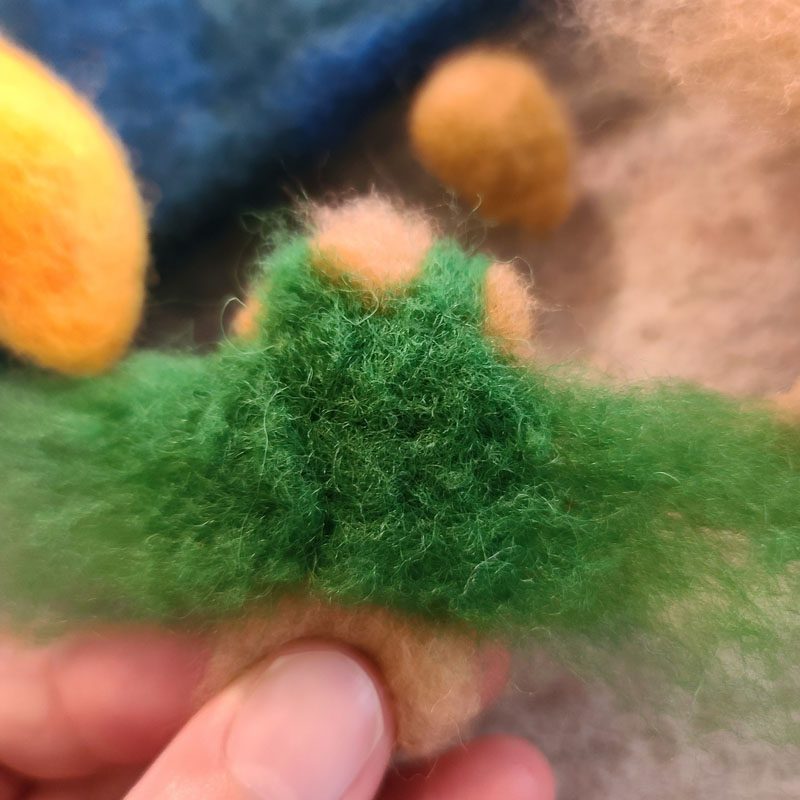
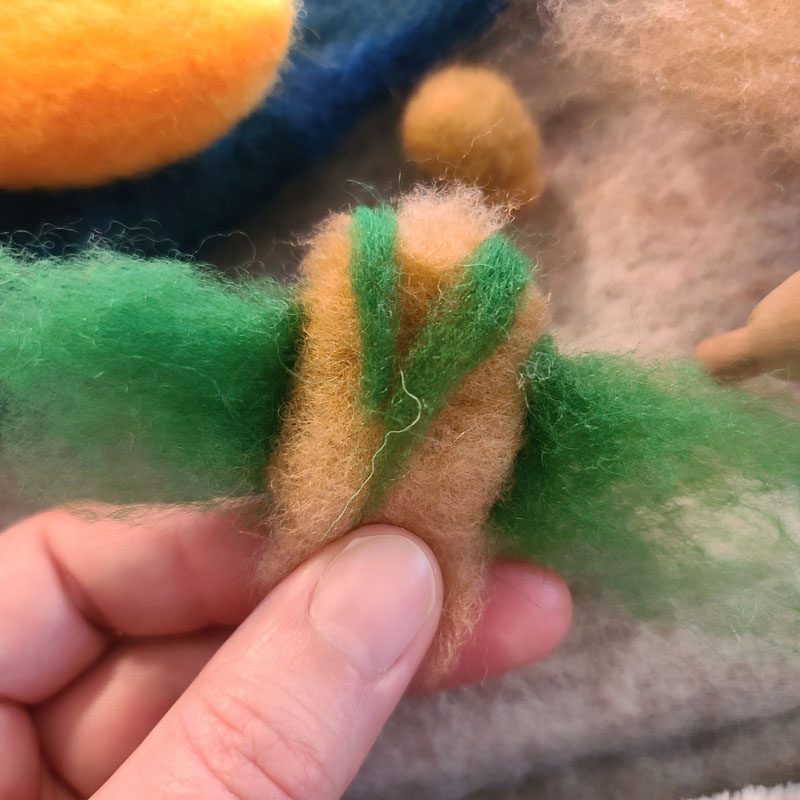
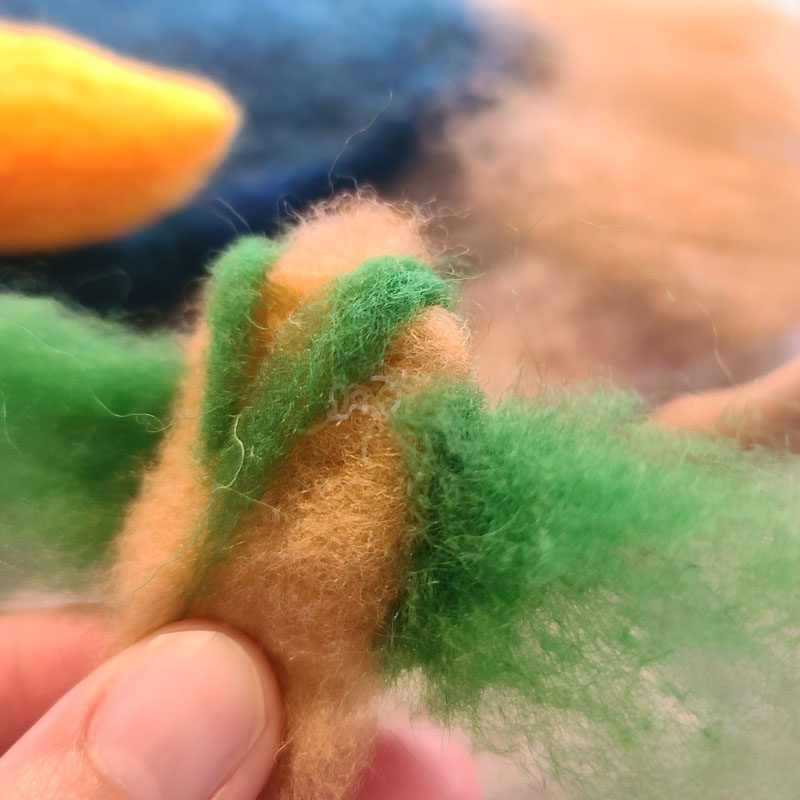
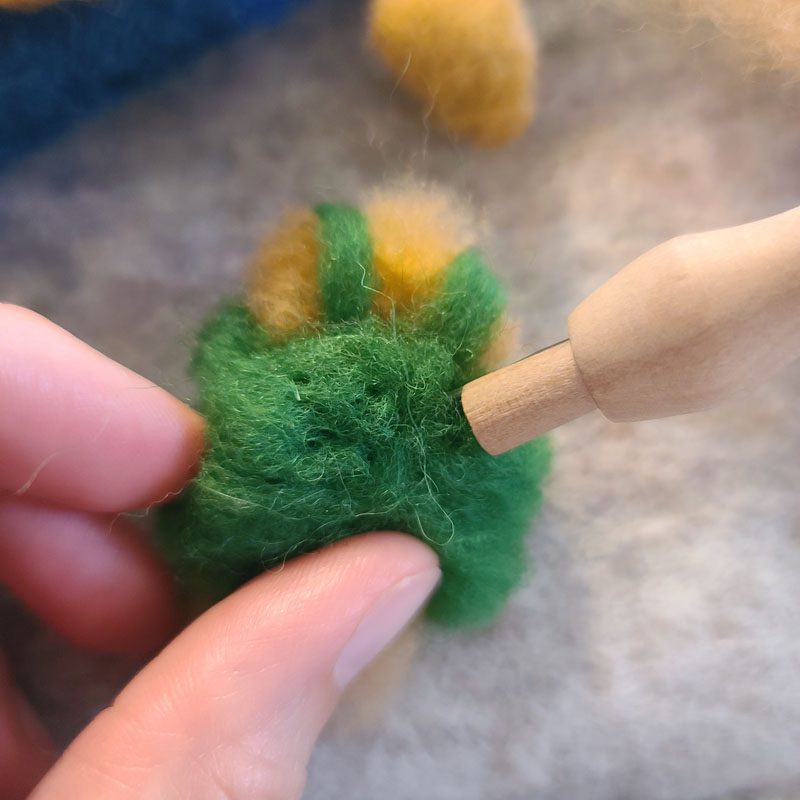
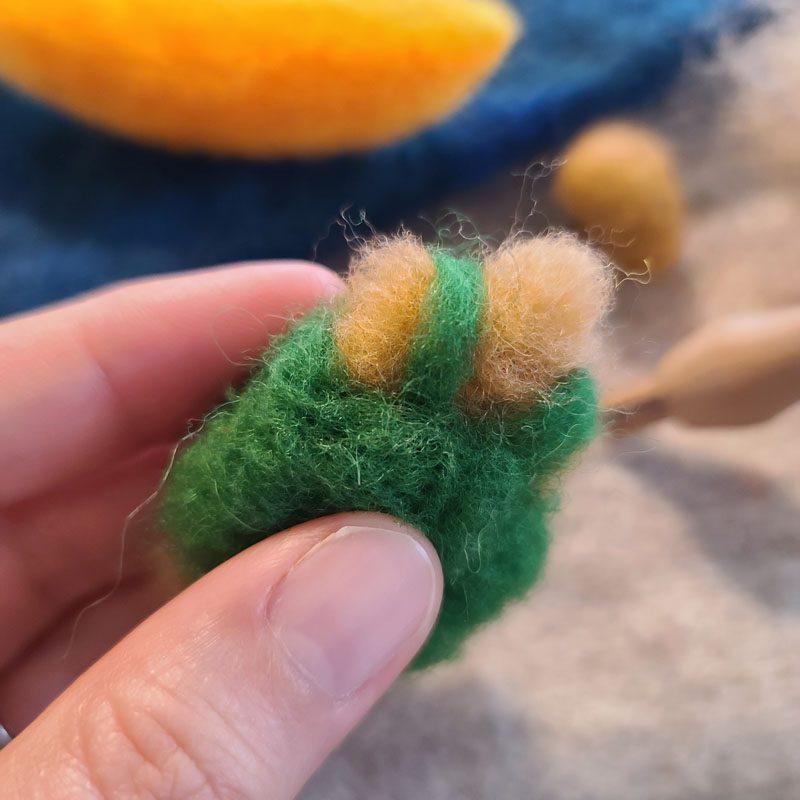
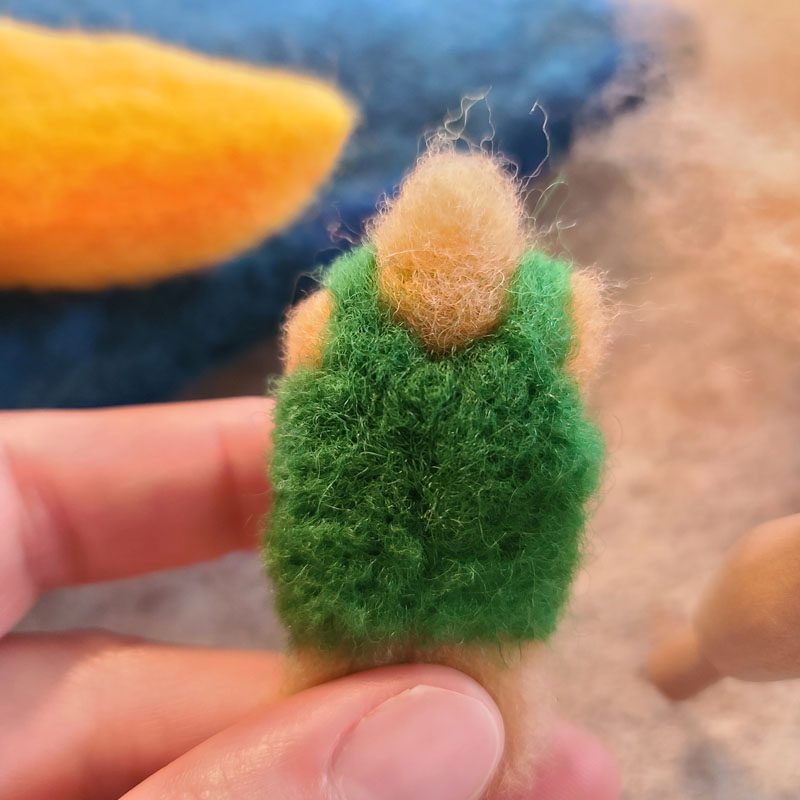
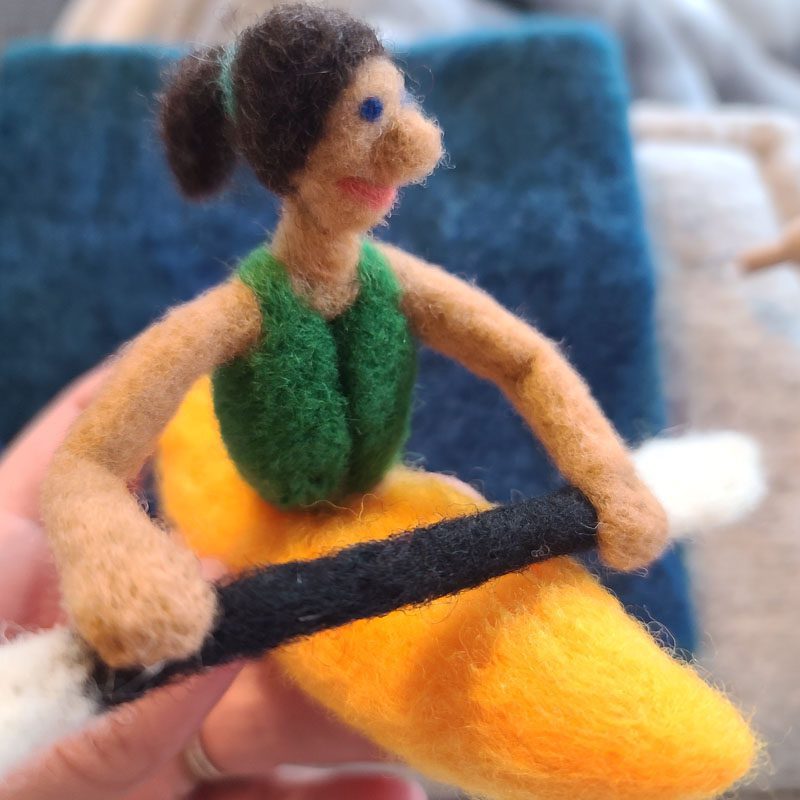
Felting a Torso and Life Jacket
The 3D shapes in my illustrations are not supported from the inside by a wire frame. I may be missing out on the benefits of adding wire, with wire also come several challenges. In the absence of a support structure, the felt remains more fluid and I can change the directionality and curves quite easily. I find that the key to felting in 3D is to slowly add small pinches of wool, felt the structural components to a very dense felt, and leave tufts of wool where you will need to attach separate pieces. This gallery contains pictures of the torso and life jacket coming together.
*For optimal viewing and learning, click on the first image in each gallery to open the full view and then scroll through. If you view the images in the preview galleries only your view will be a cropped version of each image and you will miss out on the descriptive captions I have added to each picture. Enjoy!
Felting Arms and the Head
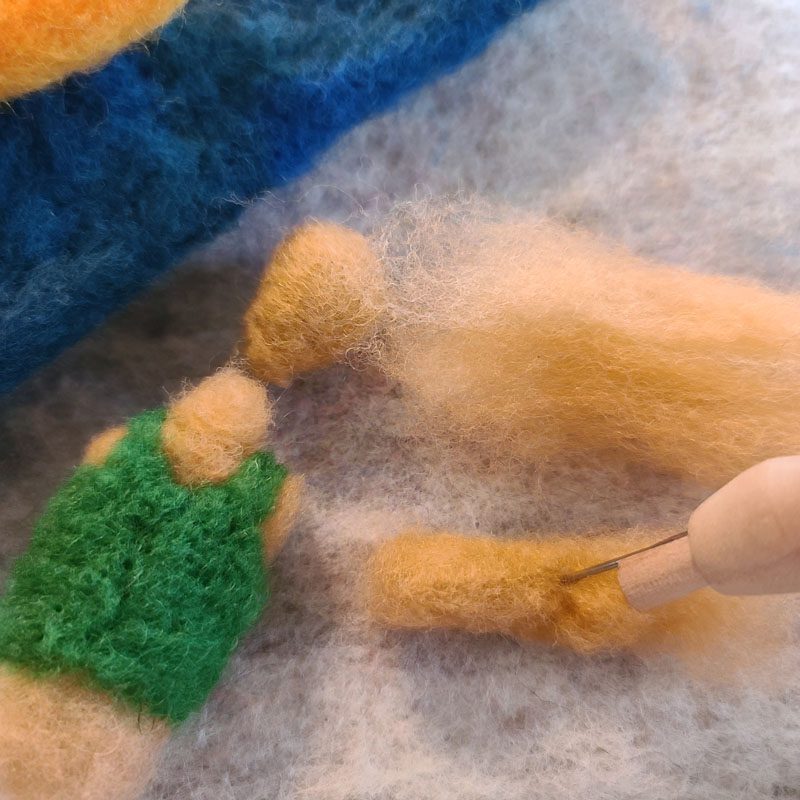
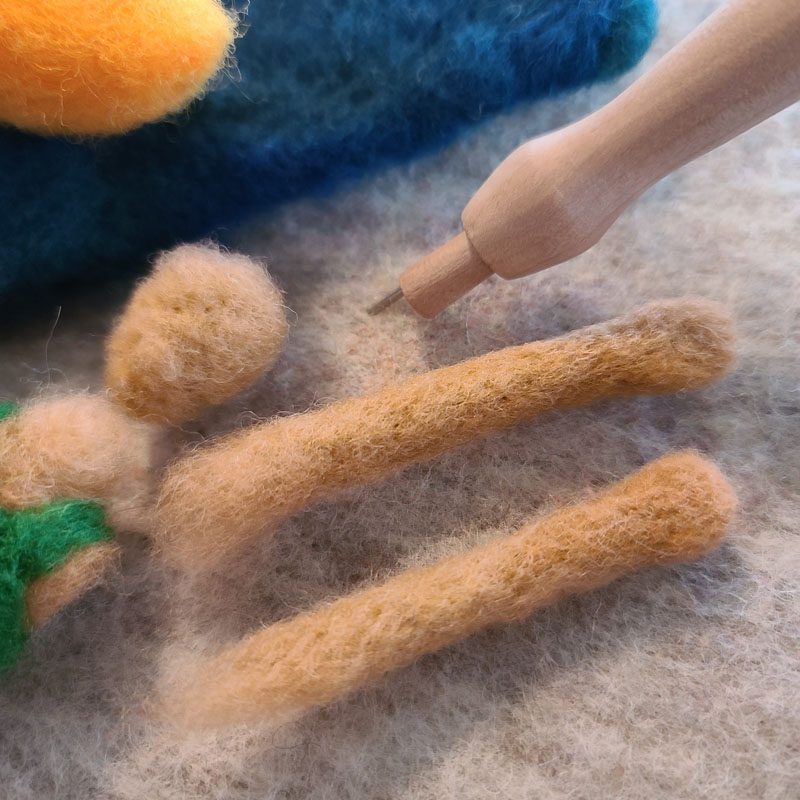
As you’ve seen in other lessons, the arms begin by portioning out two small pinches of wool equal in volume. Pulling the fibers apart and layering them to make the desired length of the arm. Getting the length right also helps by stacking fibers before you felt to create more volume, or muscle if you will. If the pinch of wool you start with is the right length but doesn’t have enough volume you can add more fibers to increase the width. An extra pinch of wool built up at the wrist bulks up into a simple hand.
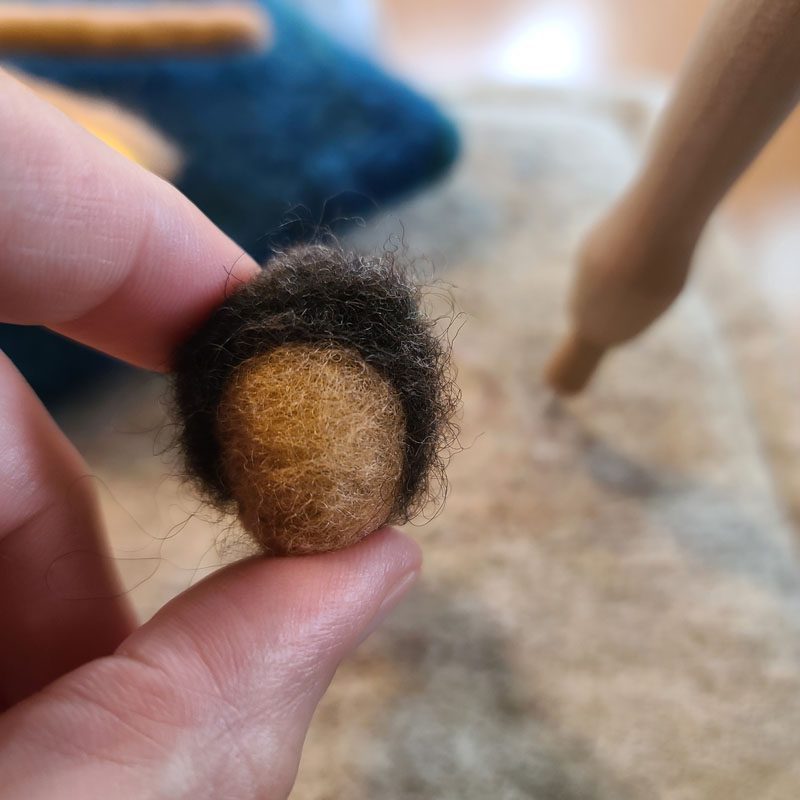
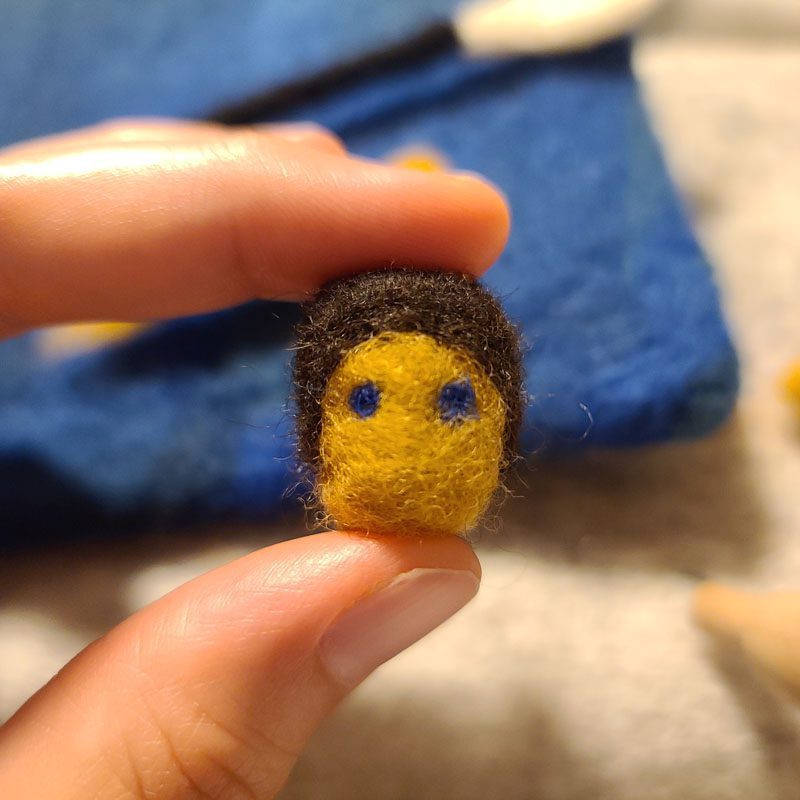
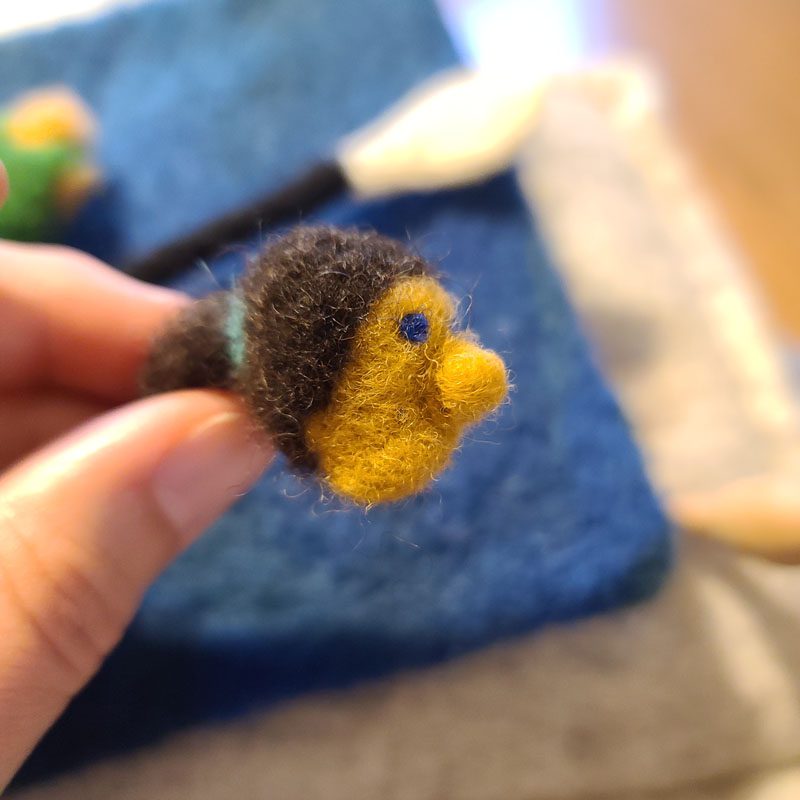
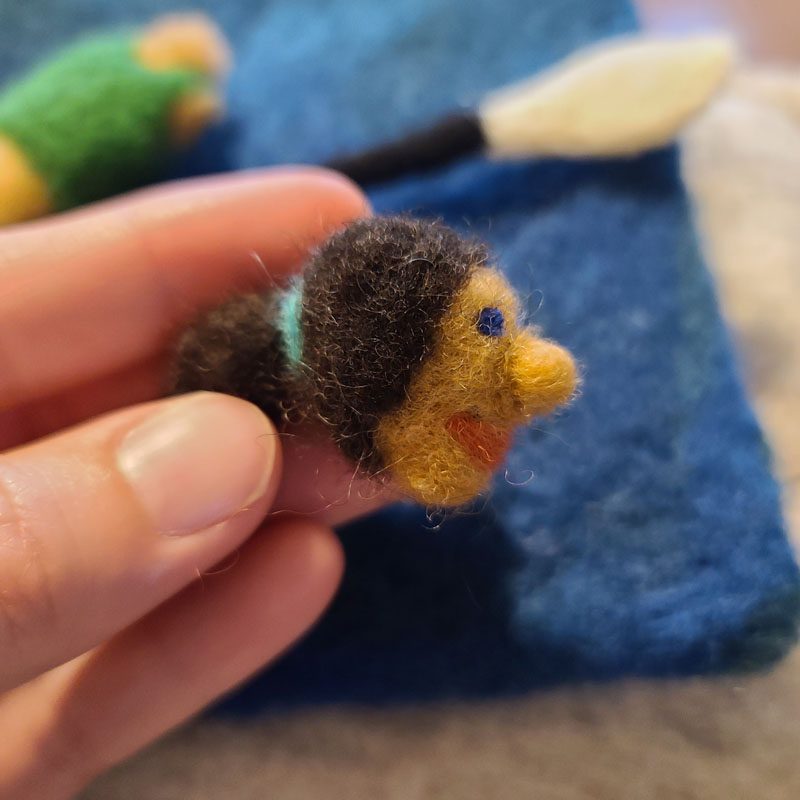
For the head, I added simple blue eyes, which take only the smallest amount of fibers. The nose is a tiny ball of wool that I rolled in my fingers and felted along the edges to attach to the face. The lips are a strip of pale pink that I rolled in my fingers and then folded in half to leave the appearance of lip lines. The ponytail was formed as a separate piece and then attached and the elastic was wrapped around last.
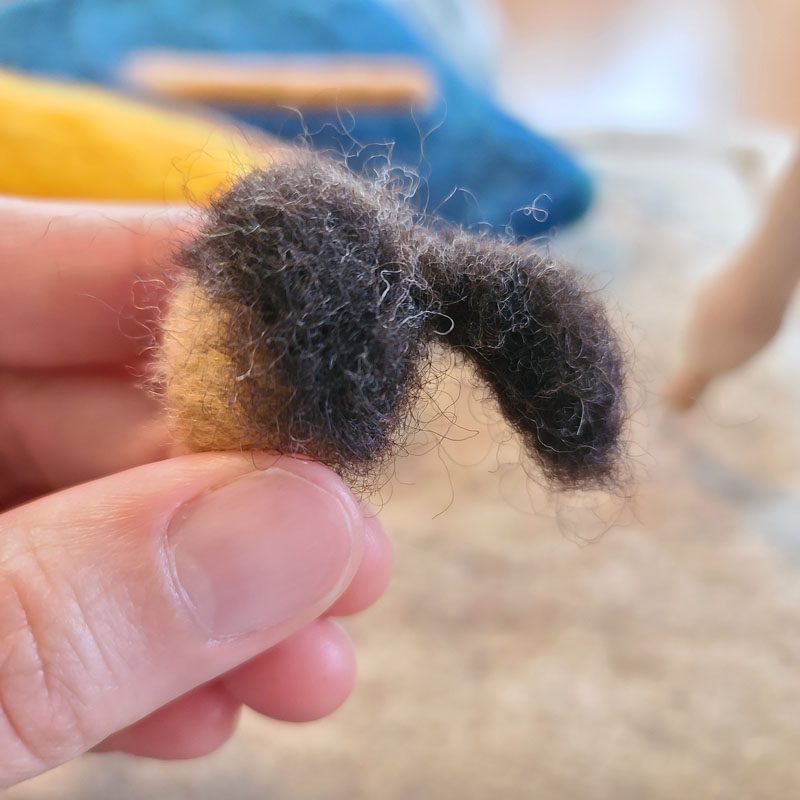
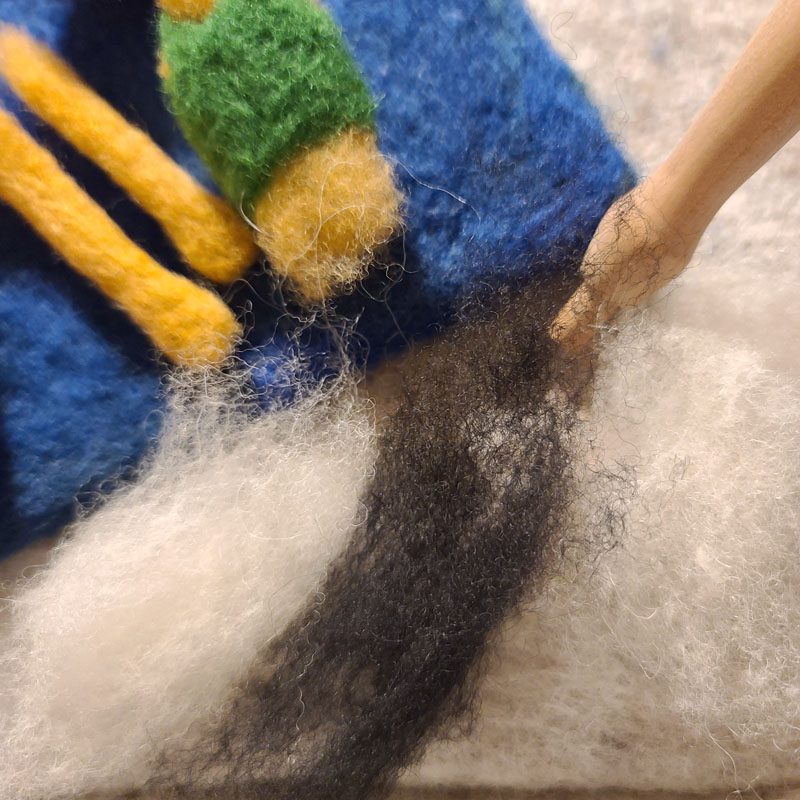
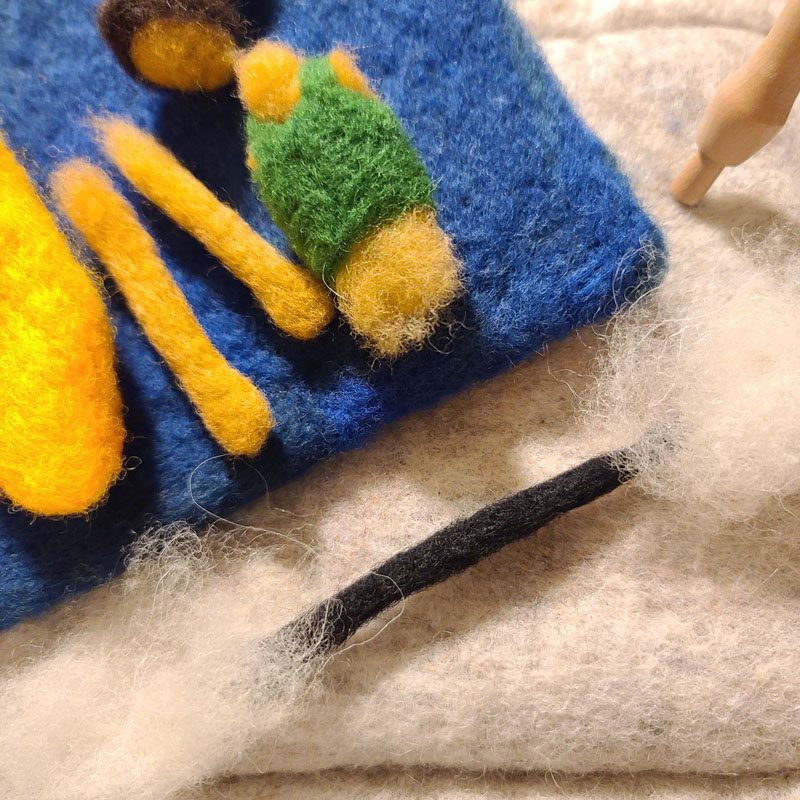
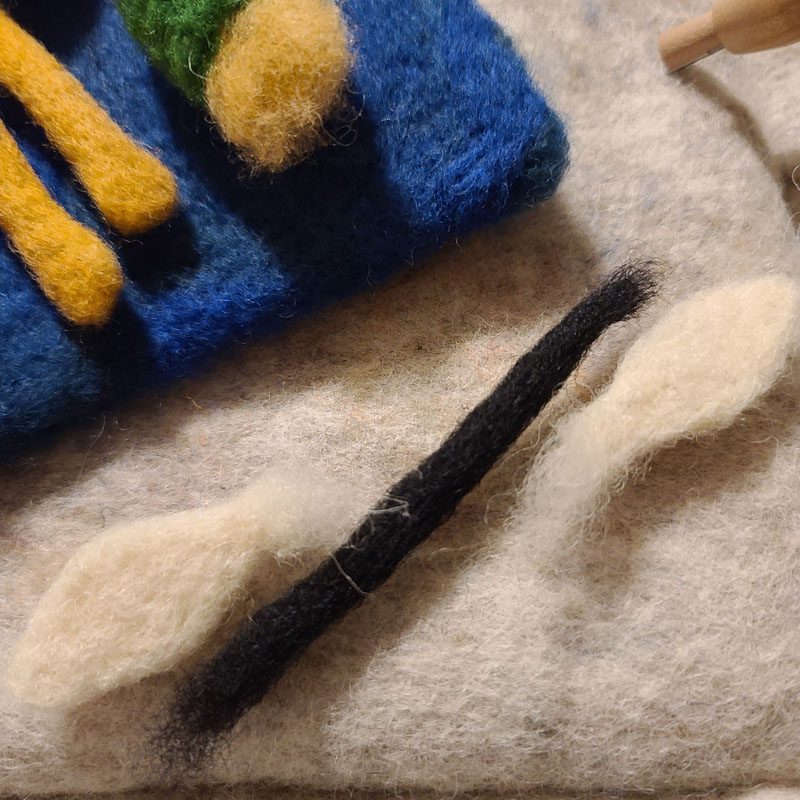
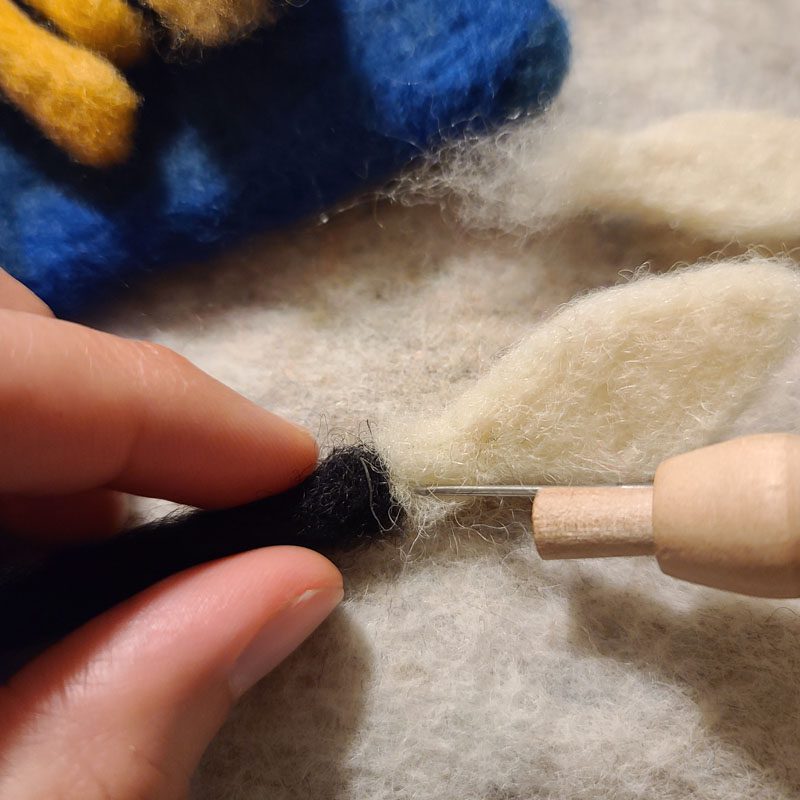
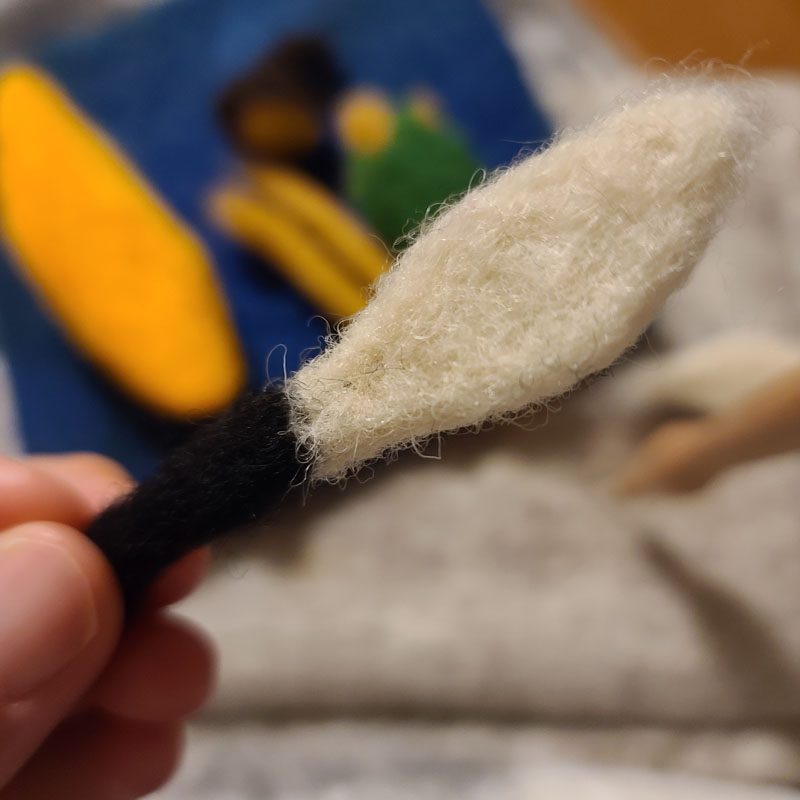
Felting the Kayak Paddle
The paddle comes together by following steps similar in nature to how the arm is constructed. Start with three piles of wool: dark and longer for the paddle bar and light and denser for the paddles at either end. The bar takes shape by rolling the wool between your two palms and then felting to add density and strength. The paddles (just like the ponytail) take shape in more of a freeform style, using the direction of the felting needle, gently pulling fibers into place before interlocking them, to form the shape of each paddle.
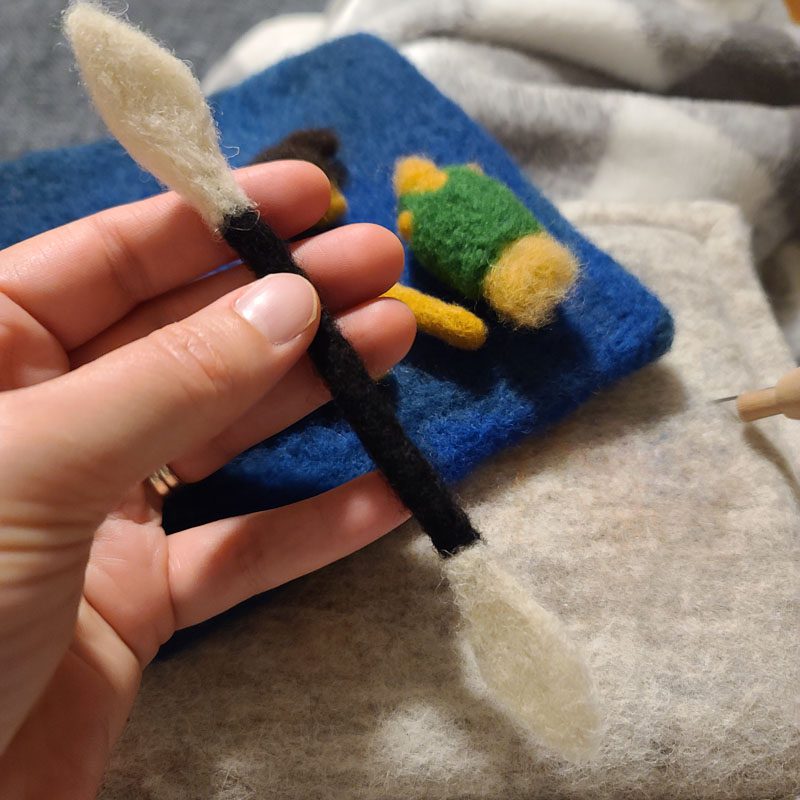
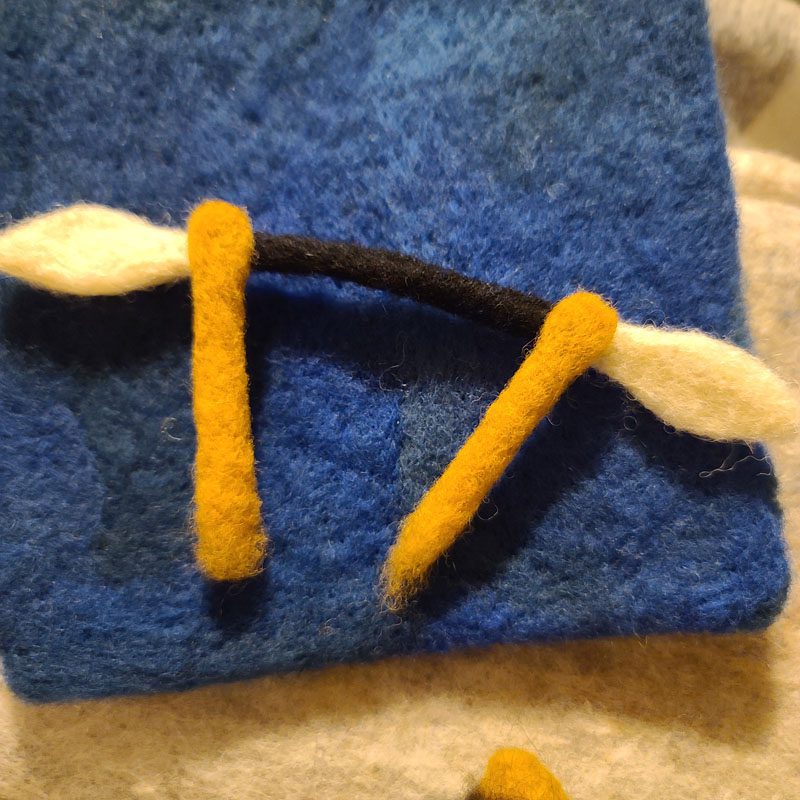
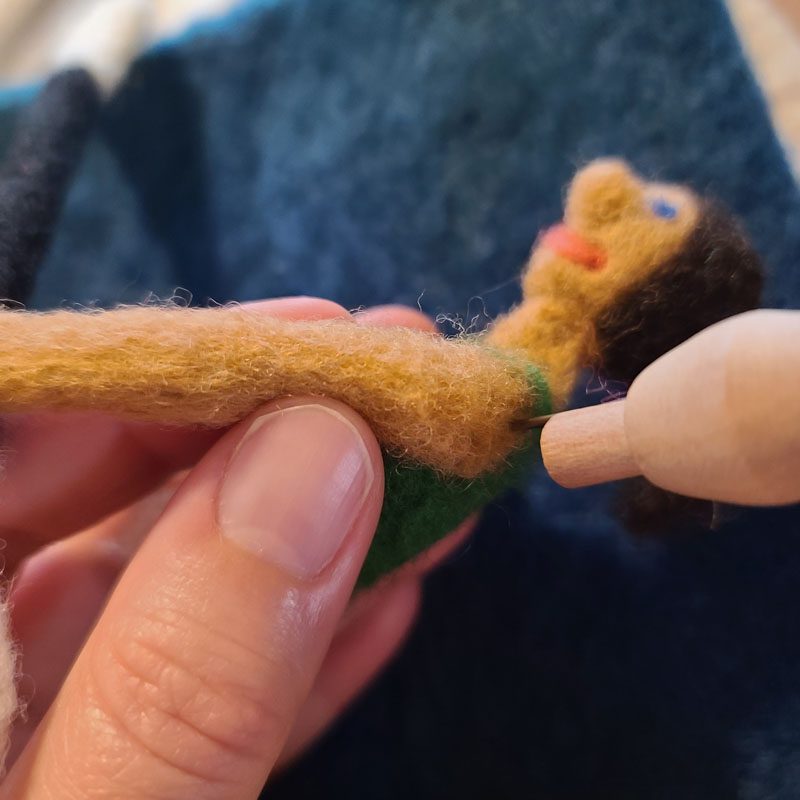
Attaching Hands to Paddle Rod and Arms to Torso
I curled the small round hand over the paddle rod and felted a firm, dense connection between each hand and the rod. Knowing the proper hand placement while paddling is near the paddle blades, I placed the hands toward each end. Using my own arms to visualize where and in which direction the elbows needed to bend. Once the arms and paddle rod were firmly attached I secured each arm in place by felting the loose fibers together at each shoulder.


Meet Your Instructor
Hi, my name is Hillary Dow. I am a mother of two, an author, artist, family chef, marketing manager, marketing consultant, felting artist, outdoor enthusiast, Maine native… and on, and on. I attended the Hartford Art School for my undergraduate studies, diving into the visually narrative world of illustration. Graduate school rounded out my studies with an MBA and I continue to run my own businesses amidst a successful career in marketing. I write and self-publish children’s books illustrated with my wool creations. It is both a thrill and an honor to help others develop their own skills and CREATE artwork. Thank you for joining me!

Have a FREE monthly felting lesson delivered right to your inbox on the fourth Tuesday of every month! Each session includes a core lesson, or simply work on your current project while picking up new techniques and tips!
Want even more?
Take your felting to a whole new level! Join the Felting Master Class today! Membership is $200 annually or monthly payments of $16.50.
